A Hack to Keep Your MailChimp Campaigns from Going to Spam
In my last post I talked about the importance of including your name and business name in the from field of your campaigns so your subscribers can easily recognize you in their inboxes. But what if your emails aren’t landing in their inboxes at all and are going straight to spam? Well, MailChimp has a solution that you can easily implement to keep your campaigns from going to spam.
The reason your campaigns might be going to spam is because your emails appear to be coming from MailChimp’s mail servers rather than your own. To ensure that your recipients’ servers get the message that you are a real person, you’ll have to authenticate your domain. If you want to know more about authentication and how it works, you can read about it here. Authentication requires you to make some changes to your hosting account, so I’ll walk you through it with a few screen shots.
I love working with MailChimp — it’s my preferred email marketing platform — and one of the reasons is because they make things like this so easy. Now if you aren’t on MailChimp, these screen shots will still be helpful, but you’ll want to google “authenticate my domain in [enter your provider]” to get their specific instructions.
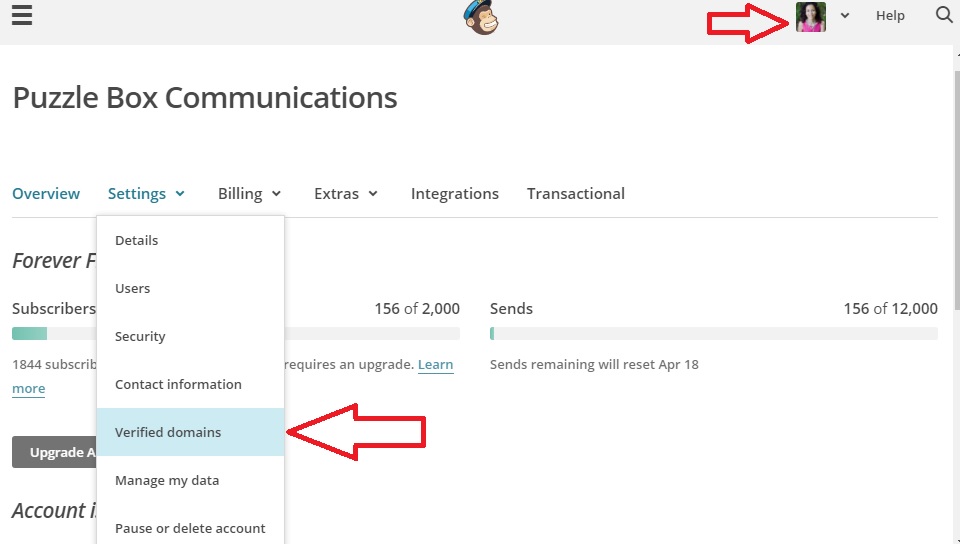
- Start by logging into your MailChimp account. From the drop-down menu in the top right, choose ACCOUNT then under SETTINGS select VERIFIED DOMAINS.

More than likely you’ll find a green check mark next to Verified. You would have had to verify your email address when you signed up for your account otherwise you wouldn’t be able to send emails at all. But you might have a red X next to Authentication. This is where you need to authenticate your domain.

2. Next to Authentication, click VIEW SETUP INSTRUCTIONS, and a dialogue box will open up with the settings you’ll need to create a CNAME and TXT record on your your hosting account. Leave that open and open a new tab in your browser. We’ll get back to that.

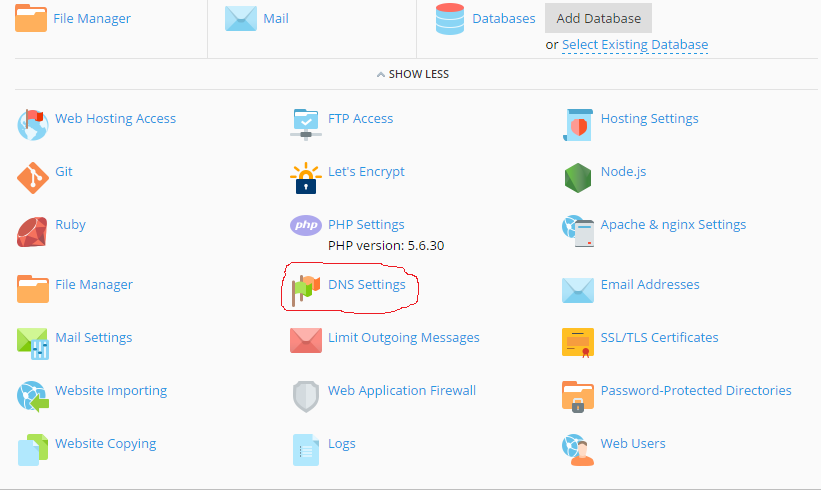
3. In the new tab, hop over to your web hosting account, log in and get to your control panel or cPanel. Find your DNS settings. On my preferred host, Websavers, they make this super easy to find.
 4. Open up the DNS settings and click ADD RECORD. Next to RECORD TYPE select CNAME. Then go back to the instructions in you MailChimp account and copy the CNAME record we’ll be creating (See the image above in step 2.) and paste it in the DOMAIN NAME box. Then copy the value (in red) and paste it in the box where it says CANONICAL NAME. Then click OK.
You might get a warning message at this point, but that’s okay. It’s because you haven’t yet added the TXT record. So let’s go ahead and do that.
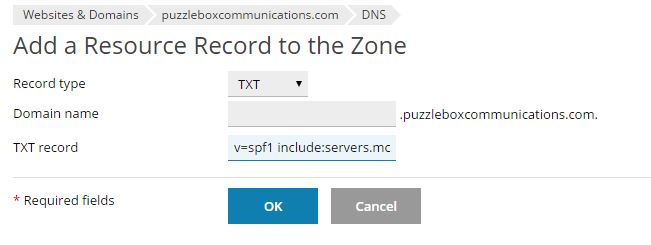
5. It’s a similar procedure. Click ADD RECORD. This time next to RECORD TYPE choose TXT. Go back to the MailChimp instructions. There is nothing to enter in the DOMAIN NAME box. Copy the value in red under TXT RECORD and paste it next to TXT RECORD. Click OK.

6. Back in MailChimp, click AUTHENTICATE in the instructions box. Depending on who your host is, this could take some time to take effect. Generally with Websavers it’s pretty much instantaneous.
Once you’ve authenticated your domain, your subscribers’ mail servers should read your emails as coming from your domain rather than MailChimp’s, which tells them that you are a legit person. And that’s how you keep your MailChimp campaigns from going to spam.
